Create new invoice |
  
|
Create new invoice |
|
Create your individually designed invoices with Xpert-Timer. You can either create an invoice manually by entering all data manually, or you can use the reimbursables ledger to choose from predefined categories, or bill a flat rate to your client. It's totally your decision how you create the invoice. Here is a description of the most common way:
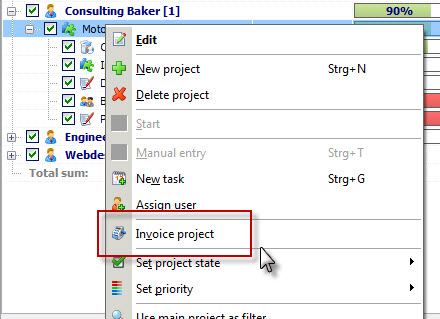
1.Right-click on the client in your project manager and point to "Write invoice". This will open the "Create invoice" dialog directly.

1.If you right click on a project, you can bill this project specifically.
2.Add multiple reimbursable expenses during the runtime of a project and bill the client e.g. at the end of the month..

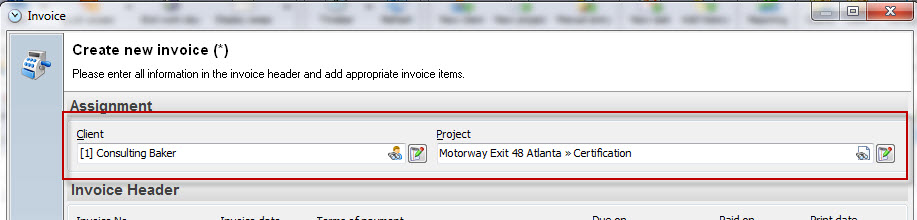
Assign an invoice to the client, or create the invoice from the client details in your client manager. Assign a project to the invoice in order to have the invoice saved under that project. If you don't enter a project here, the invoice will be saved in the client data.
You can edit almost all fields in this "Create new invoice" dialog. Just double-click and edit the data.
If you want to bill your client a certain price, which was not calculated by the system, you can edit the price by double-clicking into the appropriate field.

|
Attention when manually editing a price |
|---|---|
Please be aware, that manually edited prices will not match the calculated prices of Xpert-Timer in the timestamp list anymore. |
|
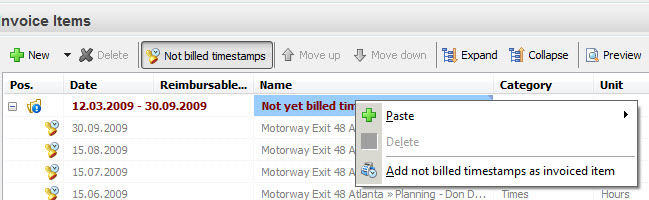
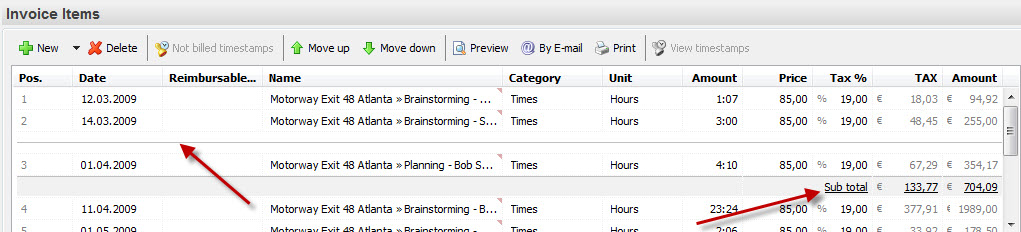
If you want to include every timestamp of a project to your invoice, you need to use the function "Not billed timestamps".
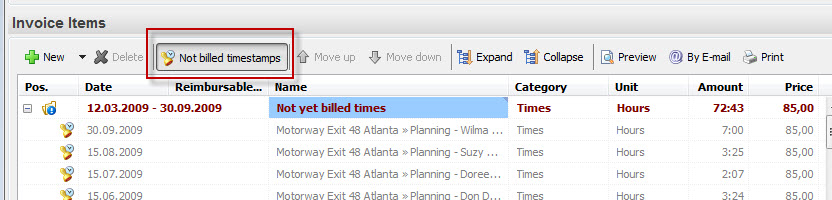
All not yet billed timestamps are displayed. Also "not billable" timestamps will be displayed in brackets and are not calculated into the total sum. This view lets you double-check the timestamps.
The next step is to choose, if you want one single total sum to show up in your invoice, or if you want every single timestamp to be listed. Right click on the red marked entry and choose "Add not billed timestamps as invoiced item".
This is the dialog you can choose what to do with the entries:
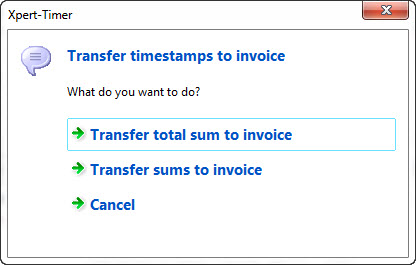
In our example we have chosen to transfer sums to invoice. Now every single timestamp is listed. Now you can delete the ones you don't need. But be aware, that the timestamps in your timestamp list are marked as billed, so you manually need to change the billing status, too.
Of course another way would be to only bill the total sum of the project and attach a timestamp list to the invoice.
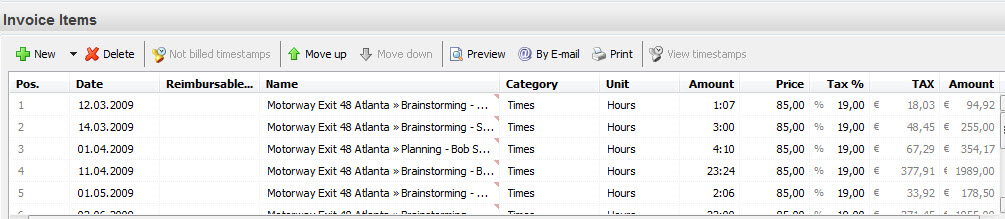
You can email your invoice directly from here or print it, in order to mail it. If you want to include the timestamp list, point to "View timestamps". In the dialog you can again filter your timestamps by clicking on the column header and grouping the timestamps by right-clicking on them. Print the timestamp list to attach it to your invoice.
In this dialog you can also enter new invoice items by pointing to "New". A drop down menu offers multiple options:
Add new invoice item: Choose this option if you want to include an invoice item which is not in the ledger. You can write any description and enter any price.
Add reimbursable expense from template: If you've created templates of reimbursables, that are billed repeatedly, use this option to add them.
Add reimbursable expenses: Here you can add more reimbursables, for example another billing period of another sub project.
Add Billing Period of Timestamps: Choose this option if you want to bill timestamps. For example from Sept 1st until Sept 30th.
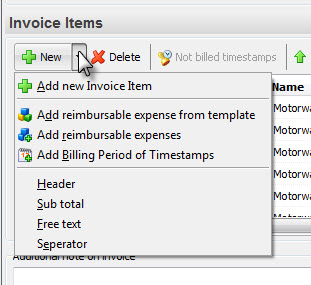
Use this dialog also, to include a free text, header, subtotal or seperator in your invoice.
As soon as you save & close, the invoice will be printed and can be saved in your document management.
You can insert some text on your invoice before your invoice items. If you right click in the text area, you can use textphrases if you have created any in the configuration of Xpert-Timer.
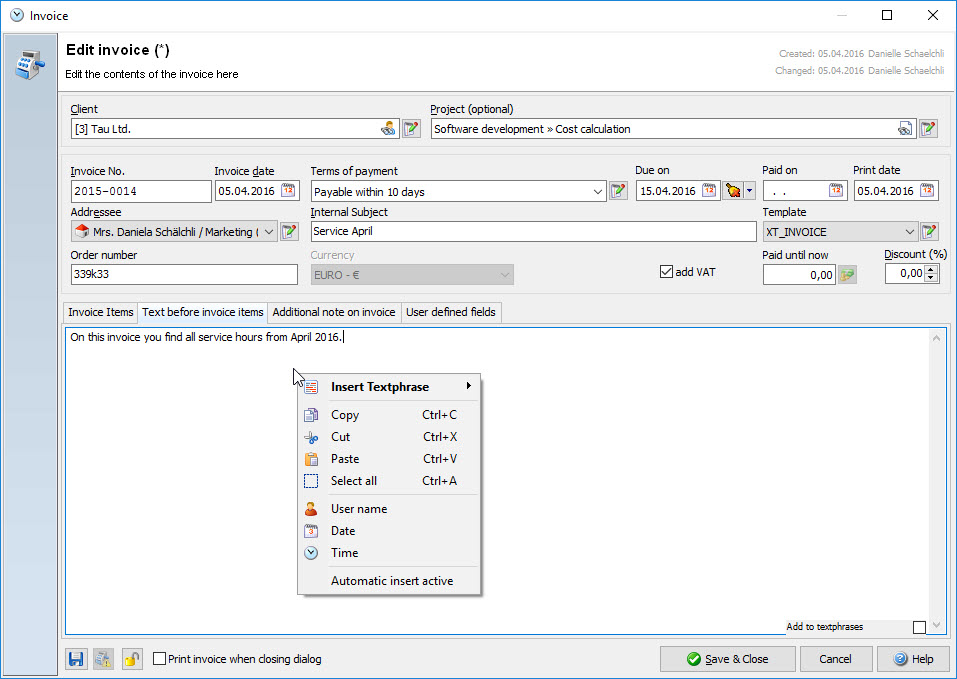
You can also additionally add a note after your list items.

You can insert user defined fields in your invoice template. Please note, that you have to add the fields manually in your template. How to do that, please read the chapter: "Edit invoice template". To make a user defined field visible, right click into the gray area of your dialog and chosse "rename field" or "Show field". You can then enter the data you need.

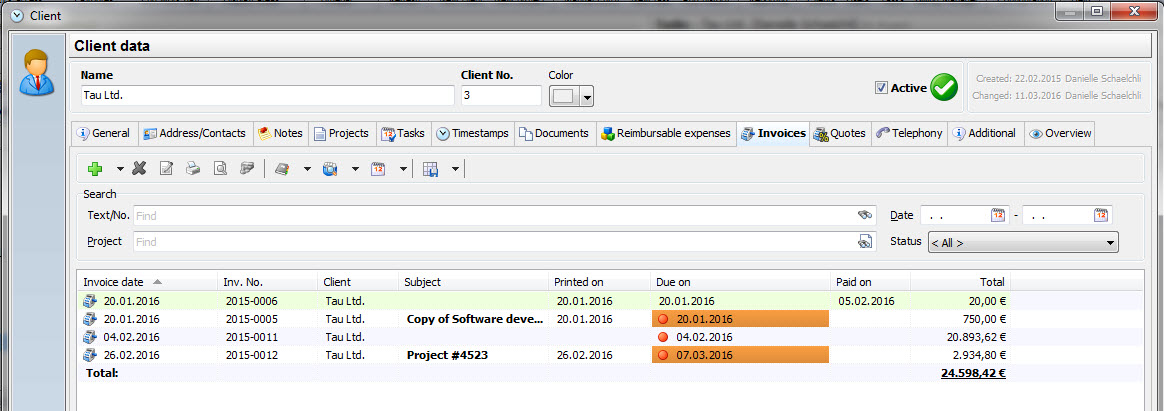
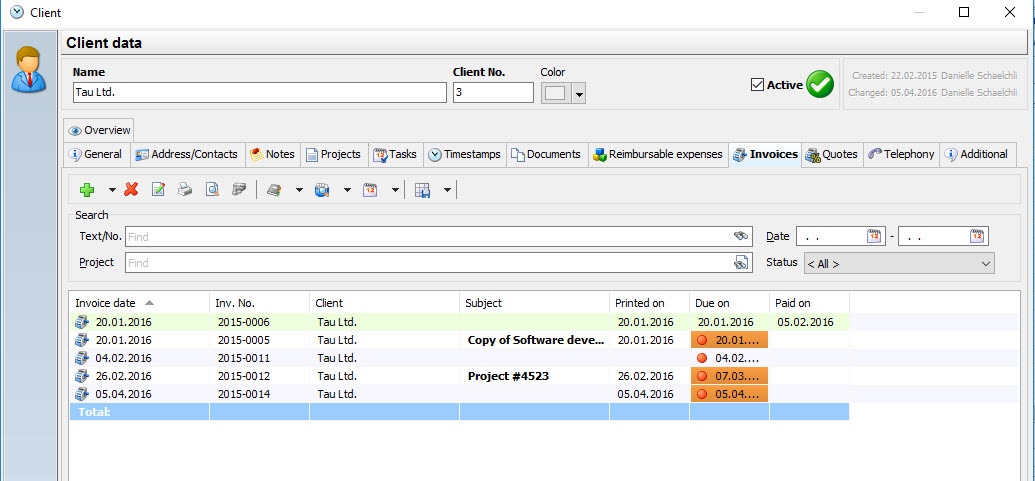
If you double click the client in your project manager or client manager you can navigate to the tab "Invoices". You find a list of the newly created invoices there.
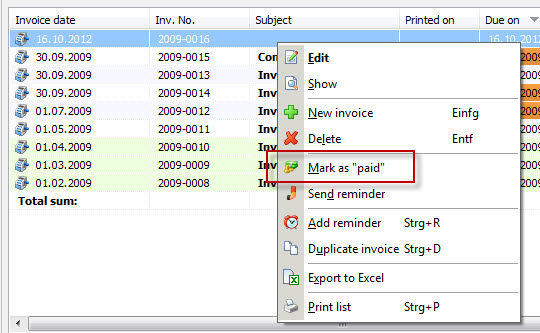
Once you've received the payment for this invoice, right click on it and mark it as "Paid".
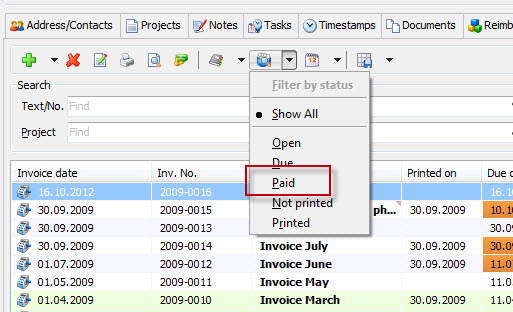
In order to keep a good overview of your open or paid invoices, use the available filters in the invoice manager.
You can also view all created invoices of a certain client in your client manager.